Monday, March 6, 2017
Java Eclipse class diagrams Tạo diagrams trong Eclipse
Java Eclipse class diagrams Tạo diagrams trong Eclipse
1. In order to install ObjectAid UML Explorer in Eclipse, go to Help -> Install New Software…
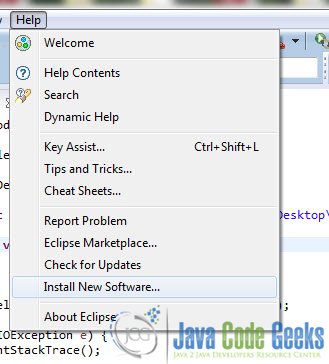
Figure 1 : Install New Software
2. Paste this URL : in the Work with text field.
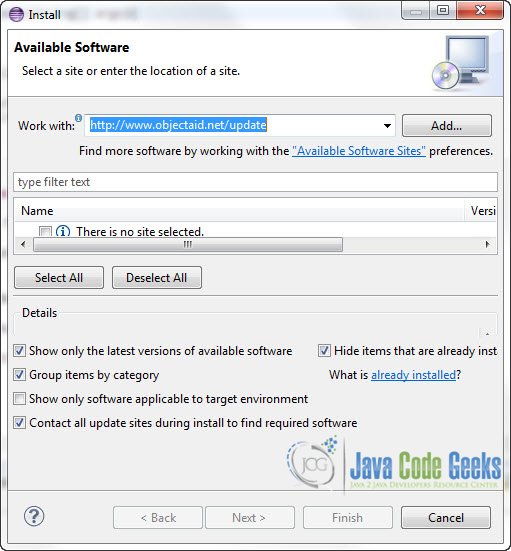
Figure 2 : Add URL
3. Click Add and put in the field and click OK.
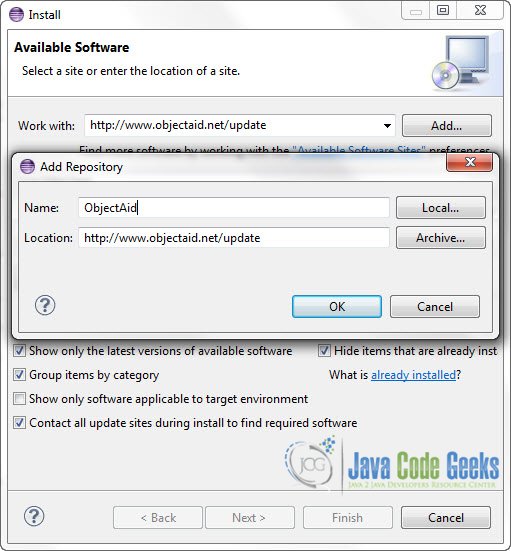
Figure 3 : Add Resource
4. Select all the plugins you want to install and click .
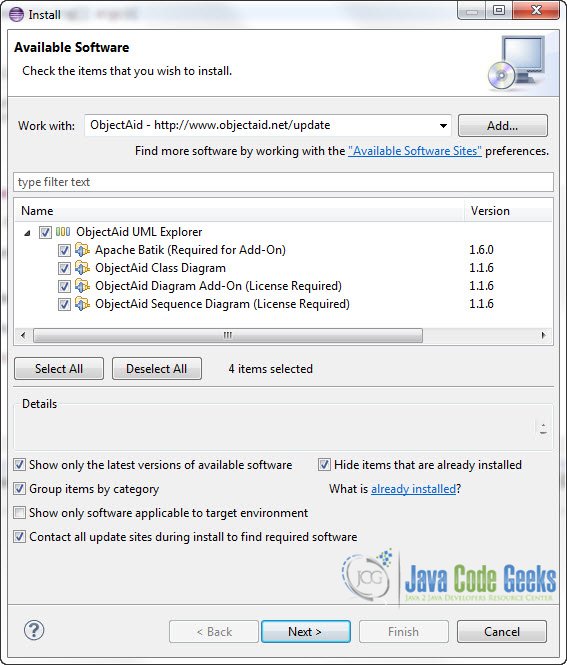
Figure 4 : Select plugins
5. You will see an overview of your installation.
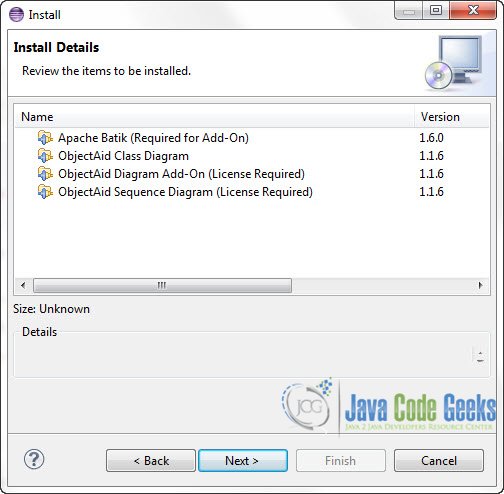
Figure 5 : Installation Overview
6. Accept the Licence Agreement and click .
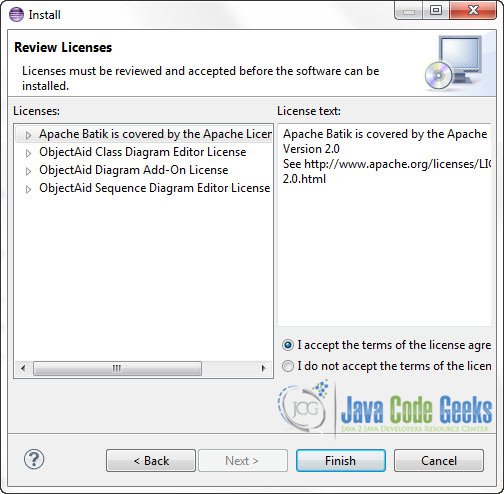
Figure 6 : Accept the Licence Agreement
7. Give it some time to install the new Software.
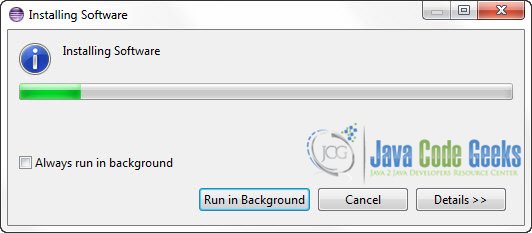
Figure 7 : installing…
It is likely the a Warning will pop up during installation. Click to ignore it.
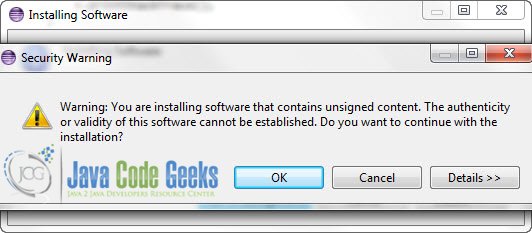
Figure 8 : Ingore Warning
8. When the installation finishes, you will be prompt to restart your Eclipse IDE. Click .

Figure 9 : Restart Eclipse IDE
2. Create a Simple class Diagram
When your Eclipse IDE restarts, this is how you can create a Class diagram for one of your projects.
1. On the Project Explorer, Right Click on the Project’s name -> New -> Other. On the pop up box, start typingClass Diagram in the Wizards text field. Click on the Class Diagram and then click .
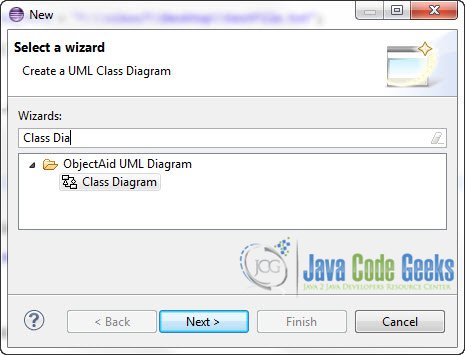
Figure 10 : Add new Class Diagram
2. Type in a name for the diagram file, and select the several details and options.
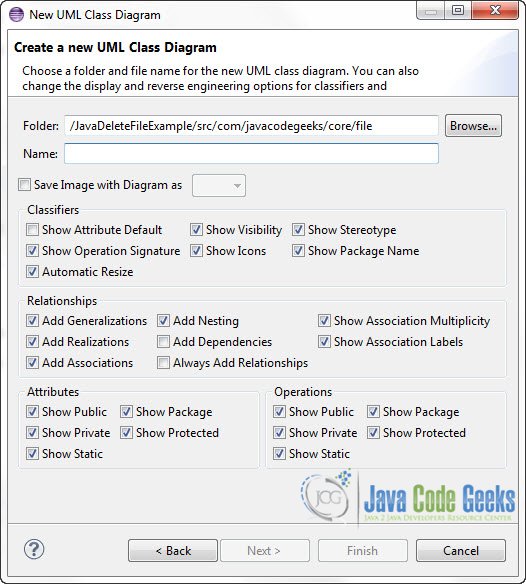
Figure 11 : Diagram Name and Options
3. After that the blanc page of the Class Diagram editor will open. From then you can Drag and Drop a class from Project Explorer in order to create it’s UML node in the Diagram. Here is a simple Class Diagram that I’ve constructed.
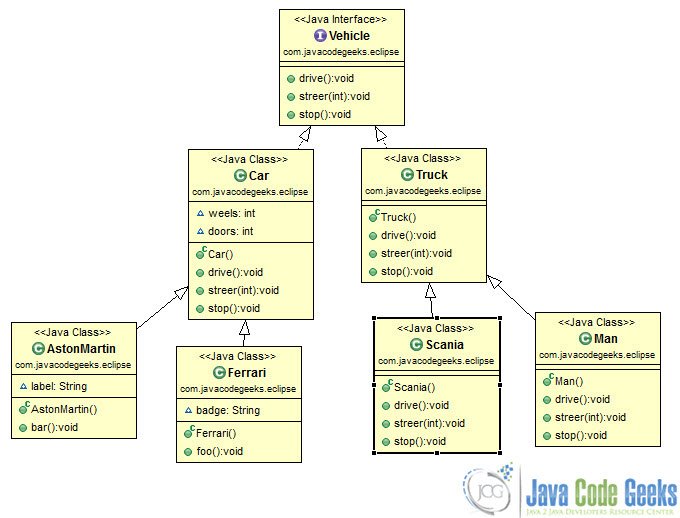
Figure 12 : A simple Class Diagram
by:javacodegeeks
Available link for download